Variable library
The Variable library feature makes it possible to create and use global variables in Onshape by storing variables on cube parts. Variables may also have associated descriptions which can be viewed via a custom table.
The Variable library FeatureScript can be found here: Variable library suite document
Steps for using variable libraries
Create a Variable library feature in a part studio.
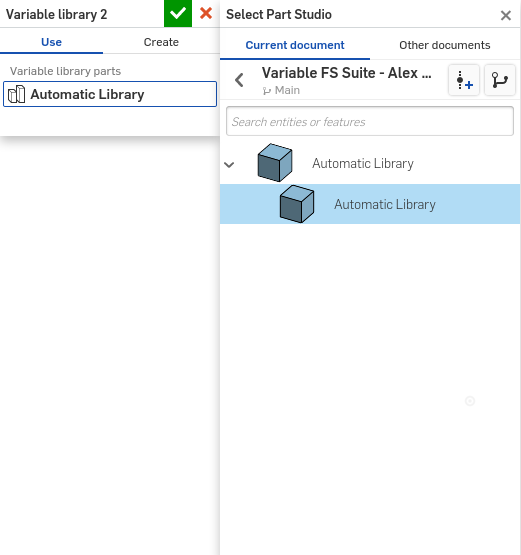
Set the Variable library useage behavior to Use.
Click Select Part Studio…, then navigate to another part studio containing one or more library variable cubes and select them.
The variables attatched to those parts are automatically added to the part studio.
Click
 .
.
Steps for creating variable libraries manually
Create a Variable Library feature in a part studio.
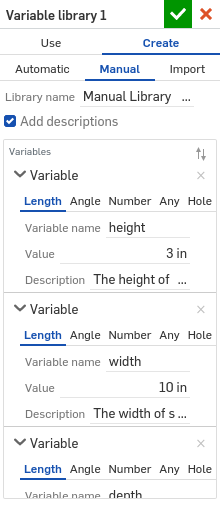
Set the Variable library usage behavior to Create.
Set the library creation type to Manual.
Add one or more variables. A library cube part is created containing each added variable.
If desired, choose Add descriptions, then add descriptions to each variable in Variables.
See also
Variable descriptions for more information.
Click
.
Steps for creating variable libraries from existing variables
Note
It isn’t currently possible to add custom variable descriptions when creating variable libraries this way.
Create a Variable library feature in a part studio with one or more existing variables.
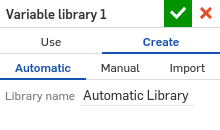
Set the Variable library usage behavior to Create.
Set the library creation type to Automatic.
Specify a Library name.
A library cube part is created containing all of the variables currently visible to the variable library feature.
Click
.
Steps for creating variable libraries from CSV files
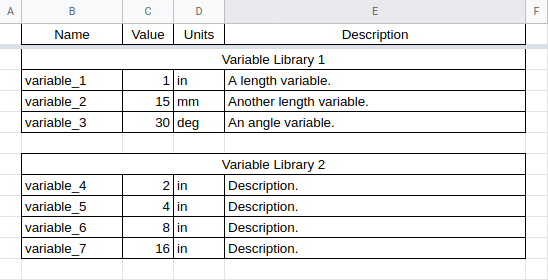
Open the Variable Library Template, make a copy, and then edit the template as desired.
The Variable Library Template can be found here: Variable Library Template
Note
Keep in mind the following while adding variables: * An arbitrary amount of libraries may be created. * Variable names must start with a single letter, followed by letters, numbers, and underscores (_). Spaces and other special characters are not allowed. * Variable units must parse to a valid Onshape unit abbreviation like in, inch, deg, or degree. Punctuation and capitalization is ignored.
AFter you’ve finished editing, download the template file as a .csv (Comma Seperated Values) file, then upload it into Onshape.
Create a Variable library feature in a part studio in the same document as your uploaded CSV file.
Set the Variable library usage behavior to Create.
Set the library creation type to Import.
Select the CSV file you uploaded to Onshape.
If your CSV file has a top-level header row, select Skip first row.
The variable library feature should add one or more variable library cube parts to the part studio.
Click
.
Variable descriptions
Descriptions can be added to manually created variables and to variables imported from CSV files. These descriptions can then be seen later on using a custom table.
To add and use the variable library custom table, you will need to first add it to your custom table tab.
Open the Custom tables panel by clicking on the corresponding button on the far right side of your screen.
Choose Add custom tables, then copy and paste the following link into the search bar:
Open the resulting document and click Library variables to add it to your custom tables.
Variables in your part studio which have been created by the library variable feature are displayed in a table format (along with their description, if added).